 By Claire Whitaker
Updated November 2026
Entryway coat closet organization comes down to three things: keeping only the coats your household actually wears, giving every item a fixed spot, and putting the most-used gear within easy reach. Follow the steps below and you will end up with a closet where coats hang without crowding, bags have a shelf, and the floor stays clear. For a deeper look, Front Hall Closet Organization: 7 Steps to a Tidy Entryway covers this in detail.
Start by Sorting and Editing
Empty the closet completely and sort everything into piles: coats, hats and gloves, bags, umbrellas, and anything that does not belong. Be honest about the coats. If a jacket has not been worn in two seasons and does not fit, donate it. Most households find they can cut their coat count noticeably without losing anything they use.
Shopping for one? See our guide: 3 Best Storage Bins for Shoes: Compared for Closets and Entryways.
Zone the Closet by Use
Divide the space into zones based on how often each item is grabbed. Everyday coats go at eye level and within arm’s reach of the door. Off-season coats, heavy parkas and rarely used items go up high or at the back. Keep a small zone near the opening for the items people grab on the way out: keys, a bag, a scarf.
Hang Smart and Add Vertical Storage
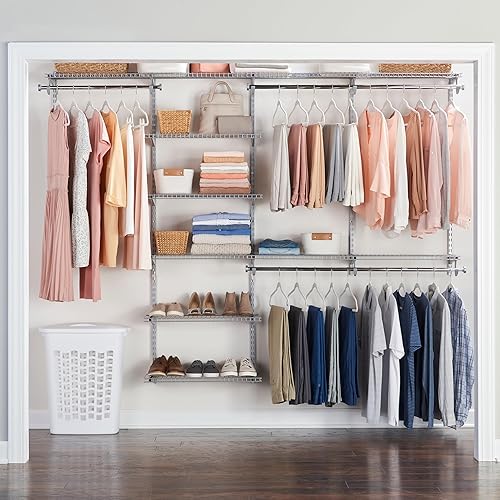
Use sturdy hangers with wide shoulders so heavy coats do not slump or bunch. Thin wire hangers stretch and distort wool and padded jackets over time. Hang coats on a single rod with about 2 to 3 inches between them so they can be removed without disturbing neighbors. Add a second, shorter rod beneath the first if your closet is at least 6 feet tall; this doubles hanging space for jackets, shirts and lightweight items.
Use the Shelf and Floor Space Efficiently
The top shelf is ideal for hats, gloves and scarves stored in labeled bins. Use a shallow basket or a fabric bin for each category so small items do not scatter. For the floor, a tiered shoe rack or a slim rack with angled shelves keeps shoes off the carpet. Place a boot tray at the base so wet footwear does not soak into the closet floor.
Plan Your Entryway Storage Checklist
- Empty the closet and sort items into coats, accessories, bags and miscellany.
- Donate or discard coats you have not worn in two seasons.
- Measure the rod height and width, and the shelf depth.
- Assign zones: everyday, seasonal, and grab-and-go.
- Install a second rod or hooks if space allows.
- Set up labeled bins on the shelf for hats, gloves and scarves.
- Place a boot tray or shoe rack on the floor and return items to their zones.
Common Mistakes to Avoid
- Packing the rod so tightly that coats wrinkle and are hard to pull out.
- Storing off-season coats at eye level, where they block daily essentials.
- Using thin wire hangers on heavy or structured jackets.
- Skipping a floor tray, which lets wet boots damage the closet bottom.
- Leaving no landing spot for keys and bags near the door.
Recommended Gear
A sturdy set of wide-shoulder hangers keeps heavy coats in shape and makes better use of the rod. View on Amazon
A tiered shoe rack or boot tray keeps wet footwear off the floor and contained. View on Amazon
Labeled fabric bins fit the top shelf and keep hats, gloves and scarves sorted. View on Amazon
FAQ
How many coats should a household keep in the entryway closet?
Keep only the coats you wear regularly, plus one or two versatile options for guests. Move seasonal or spare coats to another storage space to free up the rod.
Do I need a second rod in a coat closet?
A second rod helps if the closet is tall enough, usually around 6 feet or more. It adds hanging space for shorter items like jackets and shirts without taking up floor room.
Where should I store wet umbrellas and boots?
Place a tray or mat on the floor for boots and set a stand or hook for umbrellas near the opening. This keeps moisture off the closet floor and off the coats.
Conclusion
A tidy entryway coat closet depends on editing what you own, zoning by frequency of use, and giving every item a dedicated spot. Work through the checklist once, then take five minutes each season to reset the zones. Consistent upkeep keeps the system working year after year.
Related reading
- Small Entry Closet Organization: 7 Steps to a Clutter-Free Entryway
- DIY Hall Closet Organization Ideas: 7 Steps to a Tidy Entryway
- Coat Closet Organization Ideas: 7 Steps to Free Up Floor Space
Ready to choose one?
About Claire Whitaker
Claire Whitaker is part of our editorial team and reviews and edits our home organization guides, checking product details against manufacturer specifications and owner feedback.